
Table of contents+
Introduction
Bring the CloudStack infrastructure together
A zone is the highest-level infrastructure container in Apache CloudStack. It normally represents one data center or one physical location and contains the pods, clusters, hypervisor hosts, networks, and storage that CloudStack manages.
In this guide, we will create a Basic Zone and connect the KVM host and NFS server prepared in the earlier guides. CloudStack will guide us through the first pod, cluster, host, primary storage, and secondary storage as part of the zone wizard.
Zone
Data center
Pod
Management subnet
Cluster
KVM hosts
Storage
NFS shares
Before you begin
- • Your CloudStack Management Server should already be installed and accessible.
- • Your KVM host should already have the CloudStack agent, Linux bridges, and SSH access configured.
- • Your NFS server should already export
/export/primaryand/export/secondary. - • Reserve non-overlapping IP ranges for system VMs and guest instances before starting the wizard.
- • The example IP addresses below are only examples. Replace them with the addresses used by your own network.
Zone type
Start the Add Zone wizard
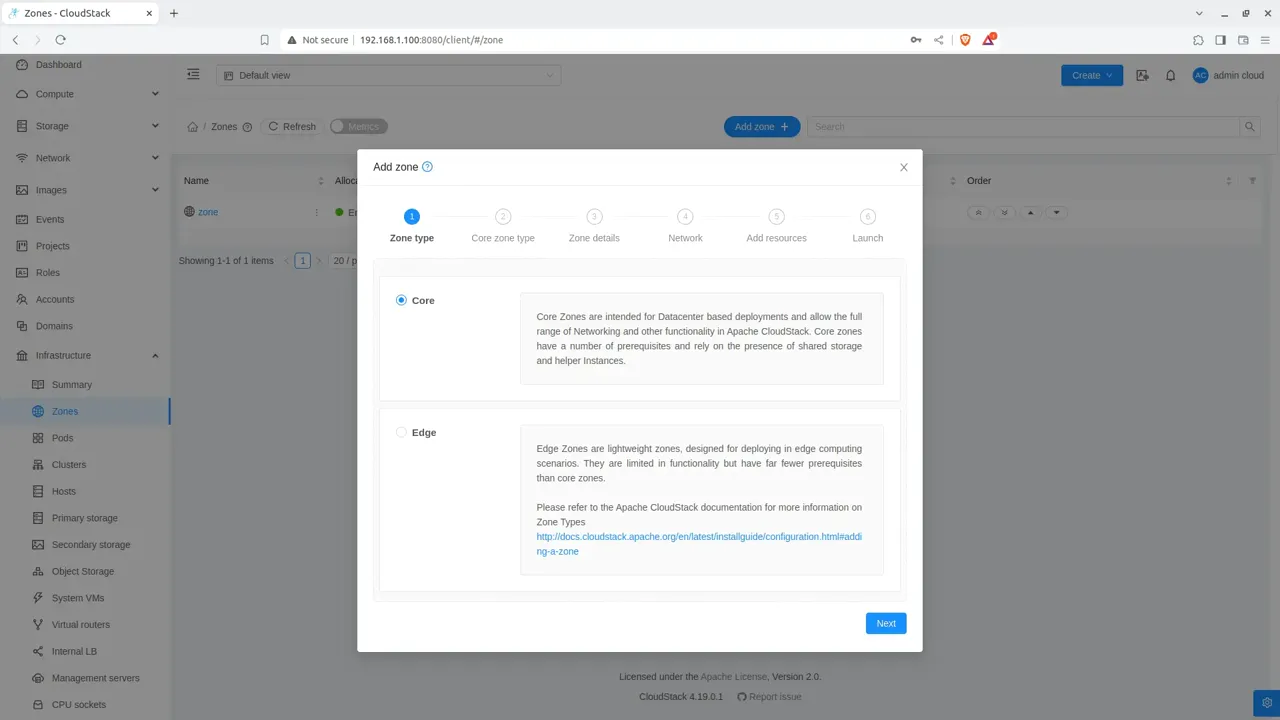
Sign in to the CloudStack UI as an administrator, open Infrastructure, and start the Add Zone wizard. Select the regular/core zone option rather than an Edge Zone.
Core zone type
Choose Basic networking
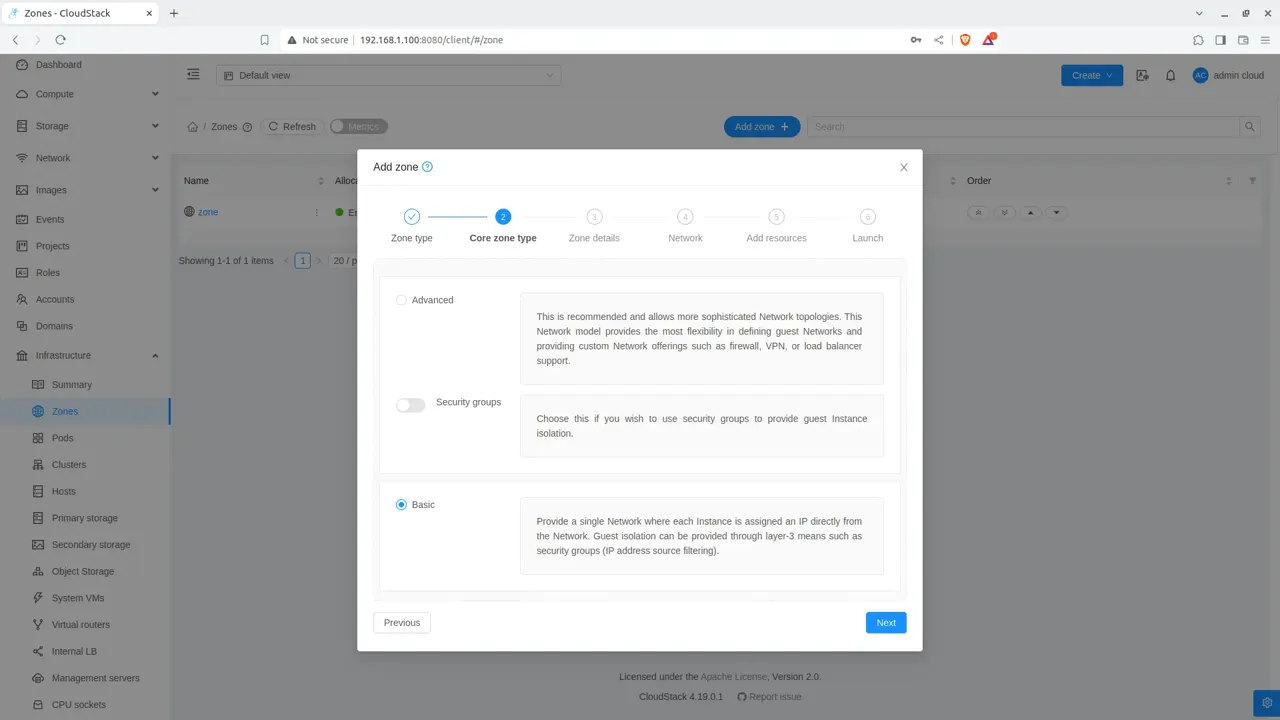
Select Basic for the network type. In a Basic Zone, guest instances receive IP addresses directly from the guest network configured for the pod. This is a straightforward model for a lab or a simple private cloud.
Basic vs. Advanced
This tutorial intentionally uses a Basic Zone. Advanced Zones support more complex isolated networks, public IP pools, virtual routers, and additional network services. Choose the network model that matches your deployment before you continue because this is a fundamental zone-level decision.
Zone details
Enter the zone details and select KVM
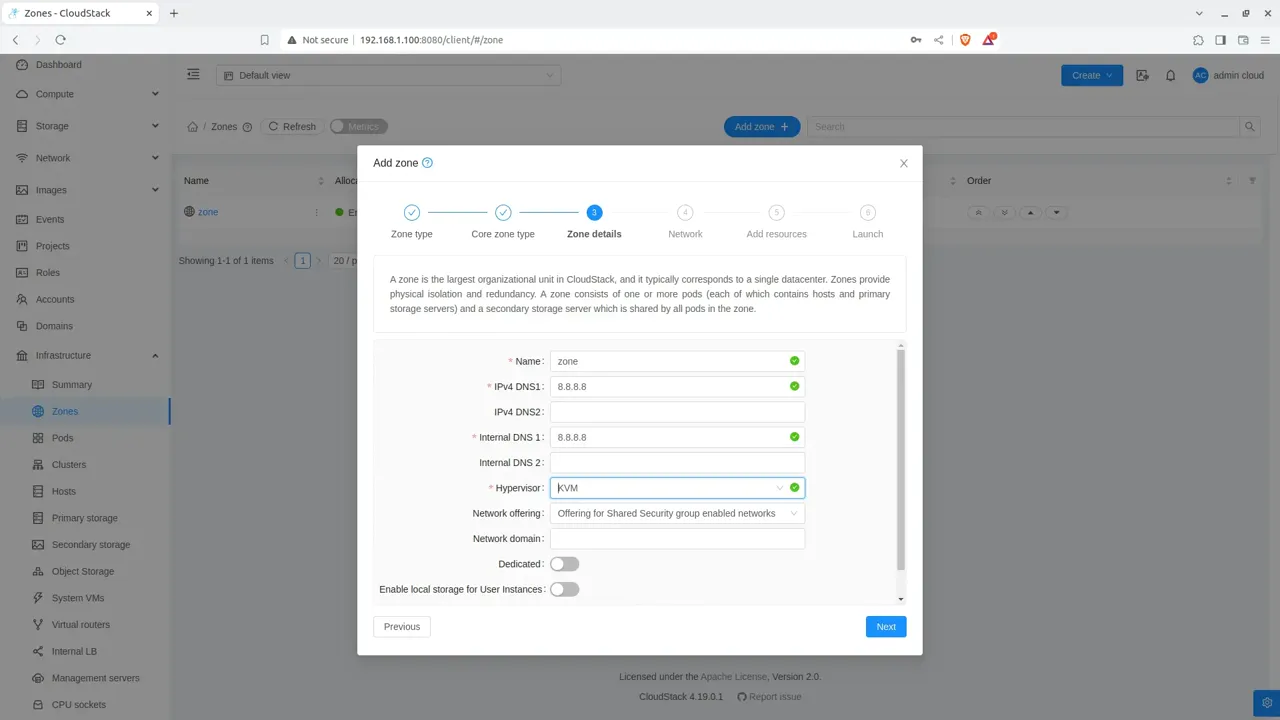
Give the zone a descriptive name, configure the DNS servers that your guests and CloudStack system VMs can reach, and select KVM as the hypervisor for the first cluster.
| Field | Example | Purpose |
|---|---|---|
| Name | Zone1 | Friendly name for the zone |
| DNS 1 | 8.8.8.8 | DNS available to guest instances |
| Internal DNS 1 | 8.8.8.8 | DNS reachable by system VMs |
| Hypervisor | KVM | Matches the host configured in Guide 02 |
Use DNS servers that are reachable from the zone
Public/guest DNS and internal DNS do not have to be the same. The important part is that the relevant network can actually route to the addresses you enter.
Physical network
Review the network and traffic labels
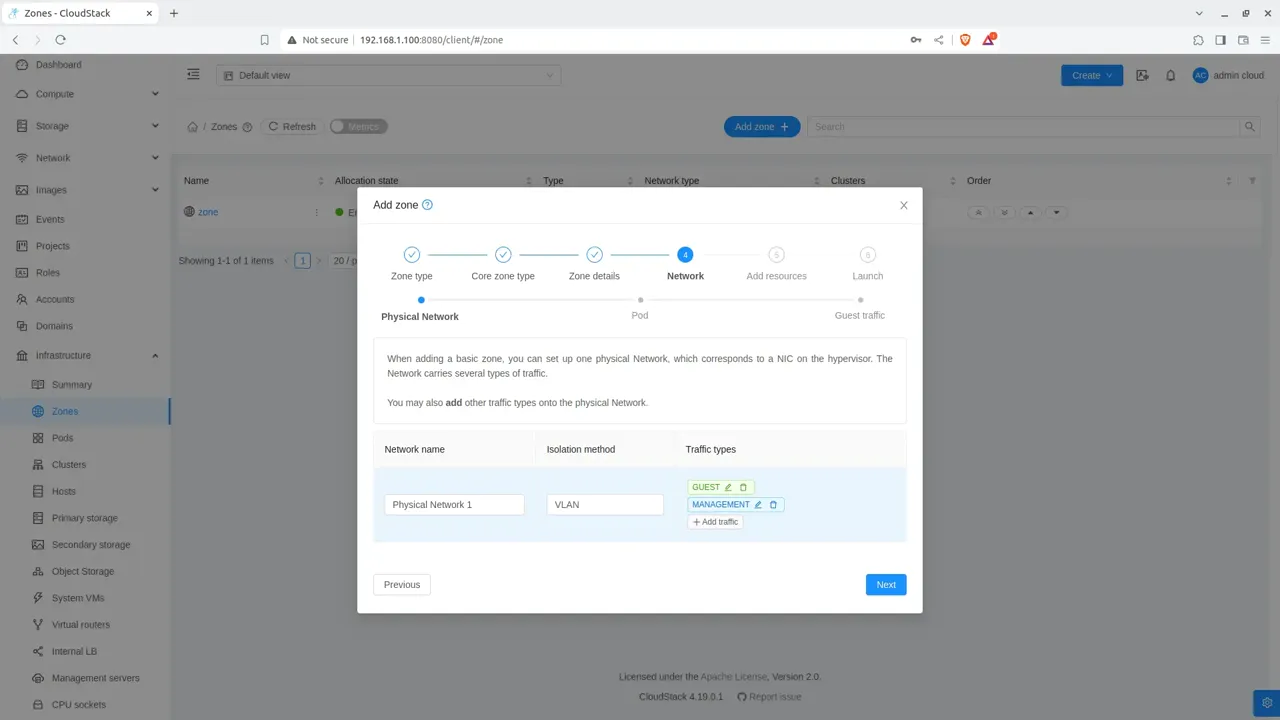
A Basic Zone uses a single physical network. CloudStack can carry management, guest, and storage traffic over that physical network, but the KVM traffic labels must correspond to Linux bridges that actually exist on the hypervisor host.
Management / Storage
cloudbr0
Matches the management bridge configured on the KVM host in the previous guide.
Guest
cloudbr1
Matches the second bridge used for guest instance traffic.
If the defaults in your wizard already match your KVM networking, you can leave them unchanged. If they do not match, edit the KVM traffic labels before moving on.
Pod
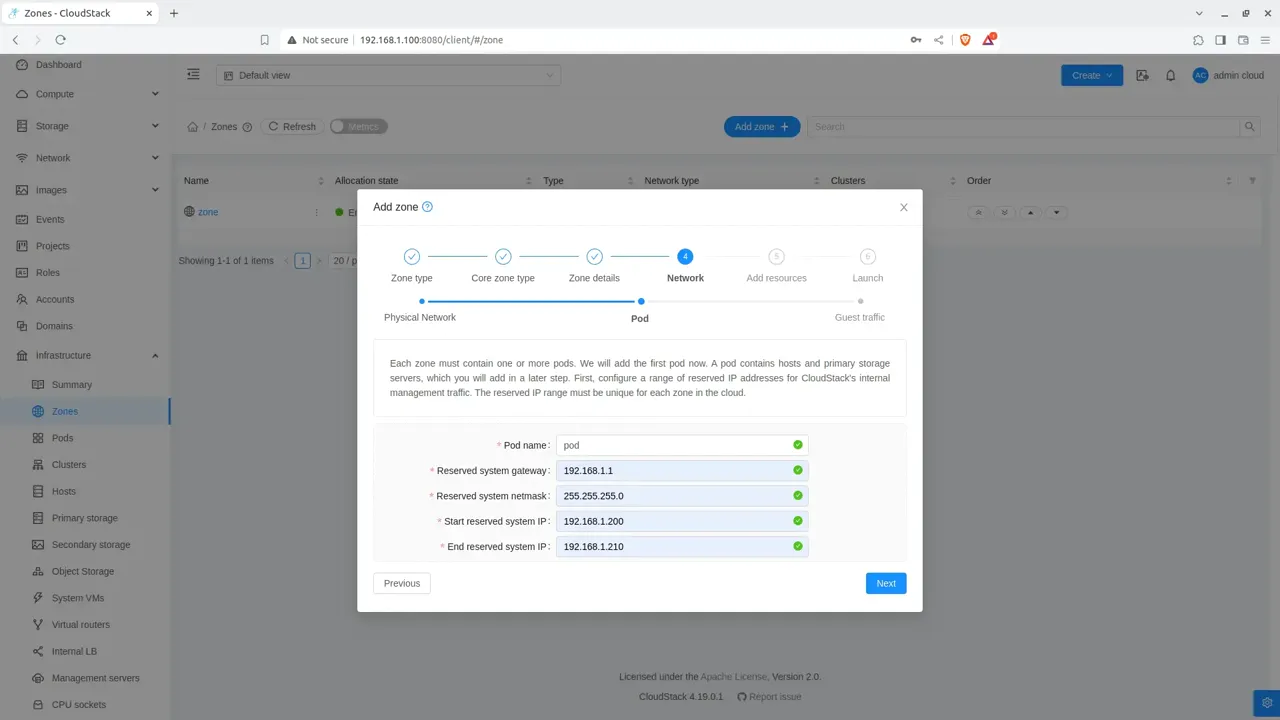
Configure the first pod and system IP range
CloudStack creates the first pod as part of the zone wizard. The reserved system IP range belongs to the management network and is used by CloudStack system VMs such as the Secondary Storage VM and Console Proxy VM.
| Field | Example |
|---|---|
| Pod name | Pod1 |
| Reserved system gateway | 192.168.1.1 |
| Reserved system netmask | 255.255.255.0 |
| Start reserved system IP | 192.168.1.200 |
| End reserved system IP | 192.168.1.210 |
Do not overlap addresses
The reserved system IP range must not include the Management Server, KVM host, NFS server, gateway, DHCP pool, or any other statically assigned device.
Guest traffic
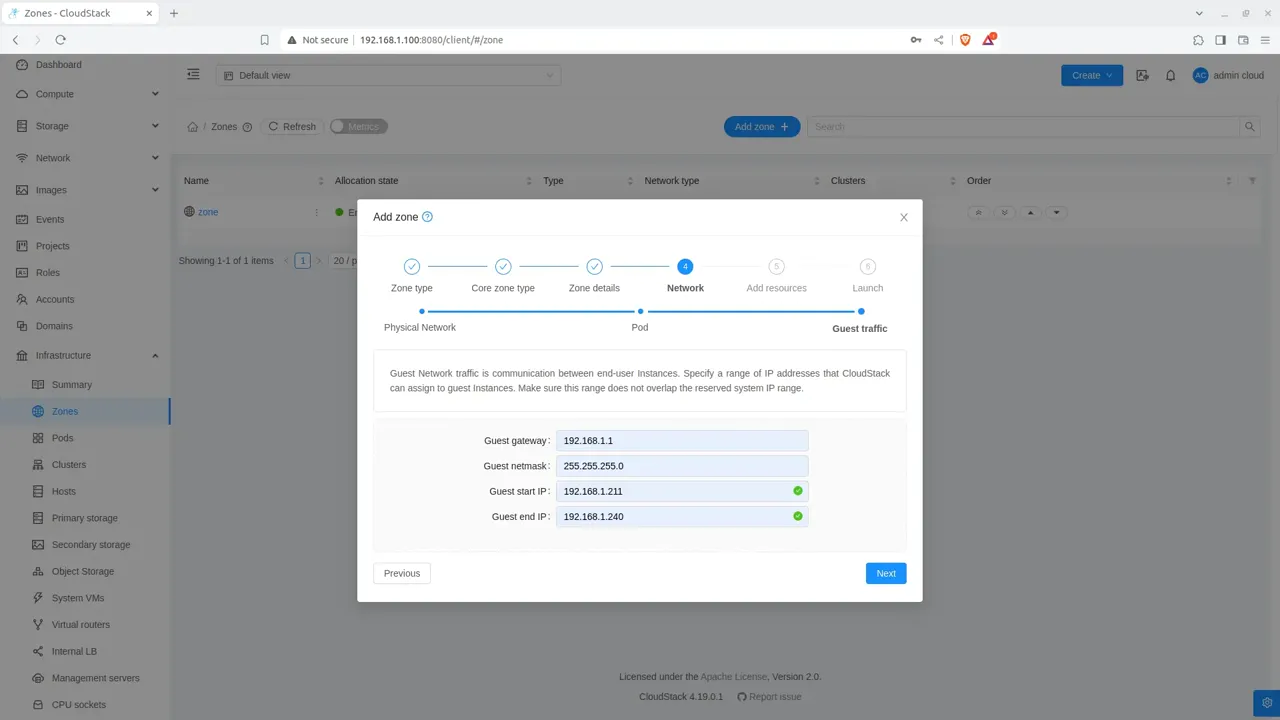
Define the IP range for guest instances
In a Basic Zone, CloudStack assigns guest instances addresses directly from the guest network range. If you followed the two-bridge KVM example from Guide 02, this range can be placed on the network connected to cloudbr1.
| Field | Example |
|---|---|
| Guest gateway | 192.168.1.1 |
| Guest netmask | 255.255.255.0 |
| Guest start IP | 192.168.1.211 |
| Guest end IP | 192.168.1.240 |
If your Basic Zone uses only one NIC/network, the guest IP range normally belongs to the same CIDR as the pod. With separate NICs, the guest network can use a different subnet. Match this screen to the physical networking you actually configured on the host and switch.
Cluster
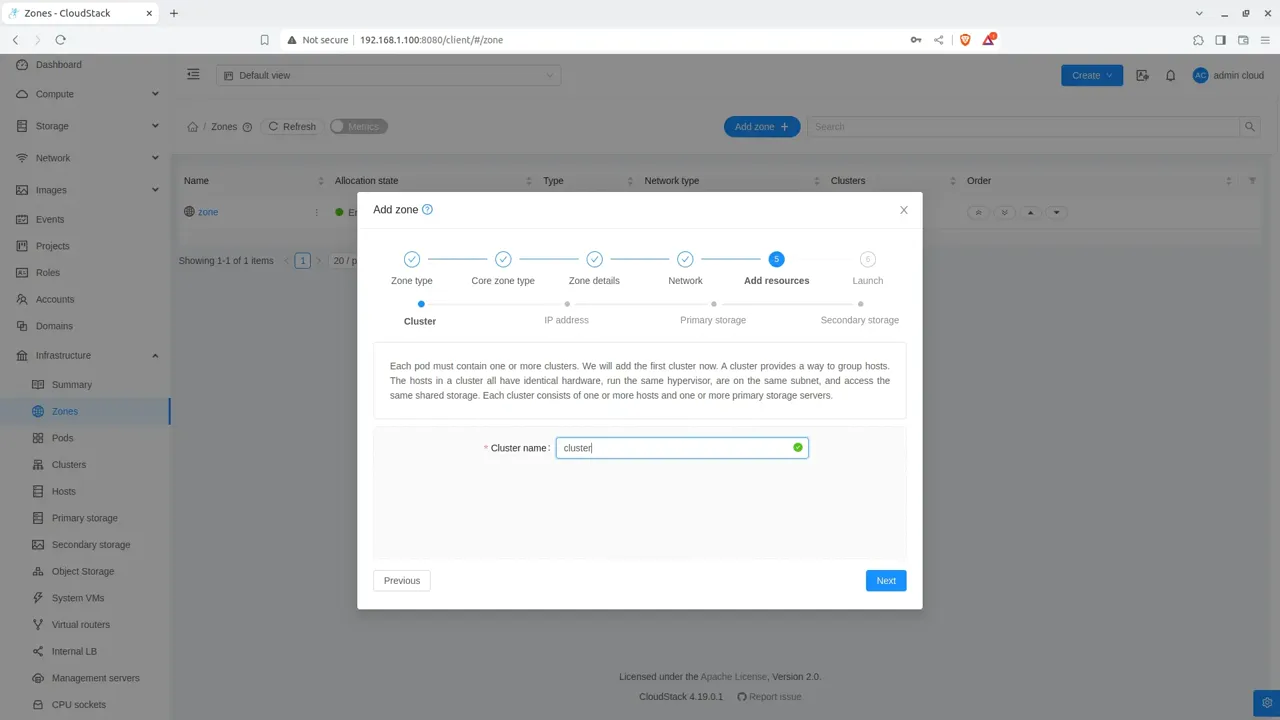
Create the first KVM cluster
A cluster groups hypervisor hosts that share the same hypervisor type and storage. Give the first cluster a simple descriptive name such as Cluster1.
Plan for consistency inside the cluster
Hosts in the same KVM cluster should use the same network layout and have access to the same shared primary storage. You can add more hosts to the cluster after the zone is created.
Compute host
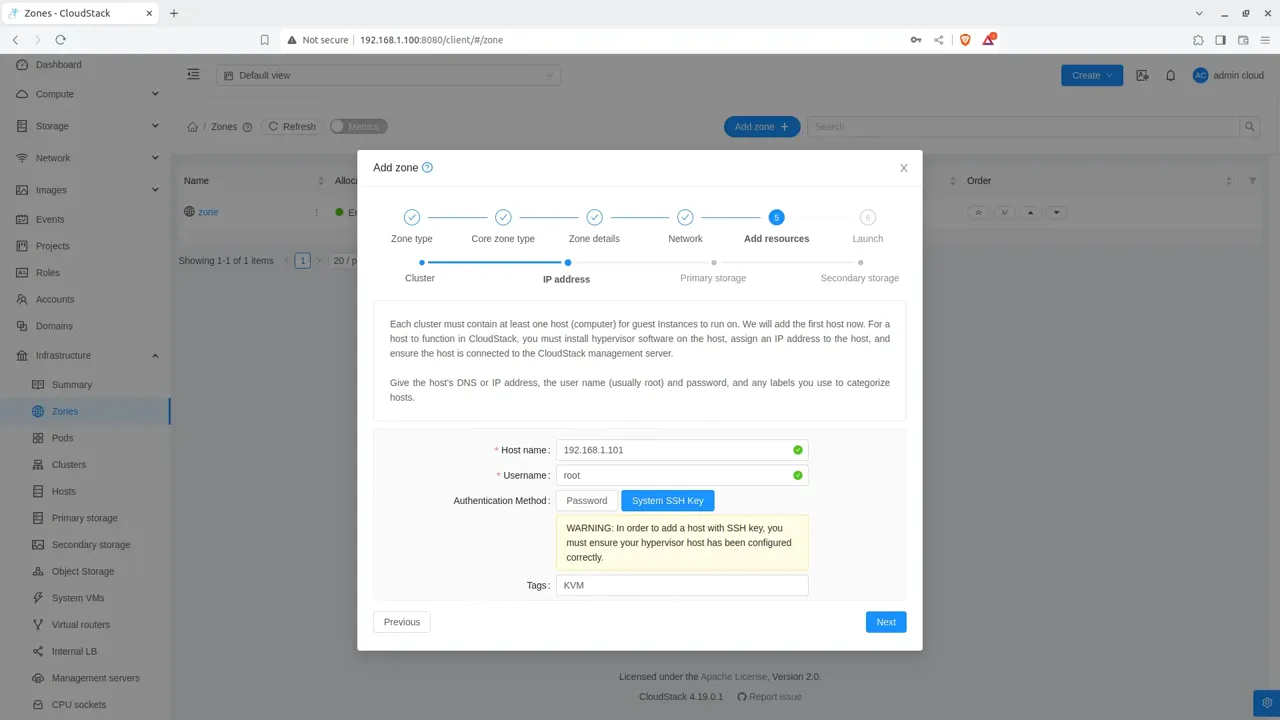
Add the KVM hypervisor host
Enter the IP address or DNS name of the KVM host prepared in Guide 02. CloudStack must be able to reach the host over SSH and the host should not already be running unmanaged guest virtual machines when it is added.
| Field | Example |
|---|---|
| Host name | 192.168.1.101 |
| Username | root |
| Authentication | System SSH Key or password |
If you followed the SSH-key setup from the KVM guide, use the System SSH Key option when your CloudStack UI provides it. Otherwise, use the root credentials configured for the host.
Primary storage
Connect the NFS primary storage
Primary storage holds the disks used by running instances. Select NFS and point CloudStack to the primary export prepared in Guide 03.
| Field | Example |
|---|---|
| Name | Primary1 |
| Protocol | NFS |
| Server | 192.168.1.100 |
| Path | /export/primary |
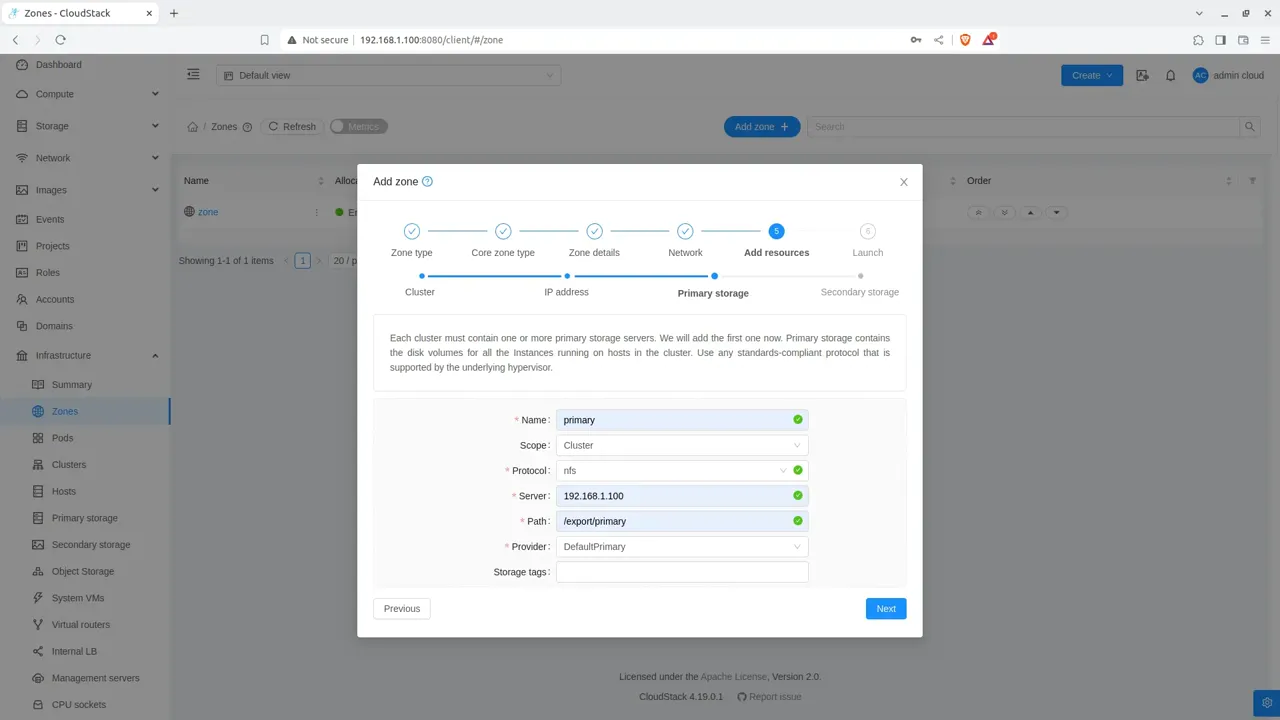
/export/primary export.Secondary storage
Connect the NFS secondary storage
Secondary storage is used for templates, ISO images, snapshots, and other zone-level resources. Point CloudStack to the secondary export prepared on the same NFS server.
| Field | Example |
|---|---|
| Provider | NFS |
| Server | 192.168.1.100 |
| Path | /export/secondary |
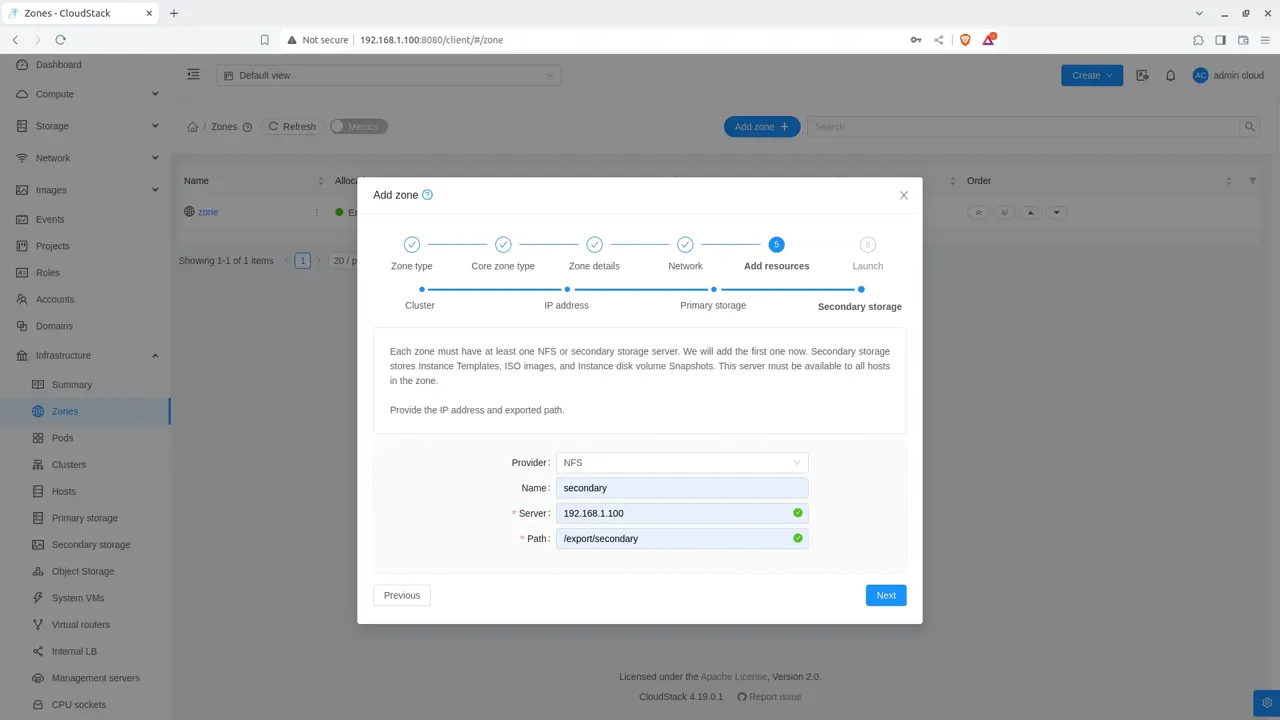
/export/secondary export.Launch
Launch and verify the zone
Review the configuration and click Launch. CloudStack will create the infrastructure resources, connect the host and storage, and start provisioning the system VMs required by the zone.
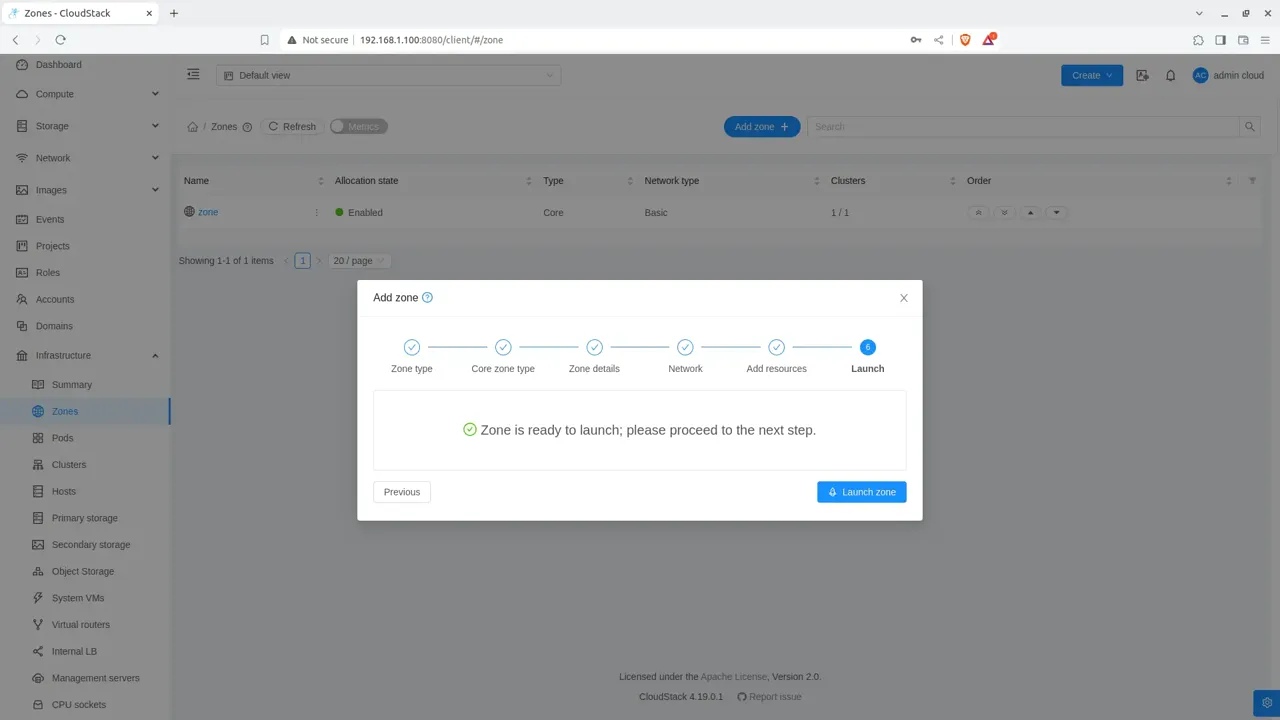
After the wizard finishes, open Infrastructure → System VMs. The Secondary Storage VM and Console Proxy VM should eventually report a healthy/running state. Initial provisioning can take a few minutes.
If the host does not connect
Check SSH access, CloudStack agent status, traffic labels, bridge names, and firewall rules.
If system VMs do not start
Check the reserved system IP range, NFS connectivity, system VM template, and management/guest networking.
Basic Zone complete
Your first CloudStack zone is ready.
The Management Server now has a zone containing a pod, KVM cluster and host, guest network range, primary storage, and secondary storage. The next step is to add templates and ISO images so you can begin deploying instances.