
Table of contents+
Introduction
Add operating-system images to CloudStack
After your zone, compute host, and secondary storage are working, the next step is to add images that users can deploy. CloudStack uses templates as reusable virtual-disk images for new instances, while ISO images behave like virtual CD/DVD media that can be used to install an operating system or attach software to an instance.
This guide continues the KVM environment from the previous tutorials. For KVM, the normal template disk format is QCOW2. ISO images are not tied to one hypervisor in the same way templates are.
Template
Reusable VM disk image
Use a prepared operating-system image to deploy instances quickly.
ISO
Virtual installation media
Boot an installer or attach software media to an existing instance.
Before you begin
- • Your zone should already be enabled and healthy.
- • The Secondary Storage VM should be running and its agent state should be Up.
- • Secondary storage should have enough free space for the template and ISO files.
- • For URL registration, the source URL must be reachable from CloudStack's secondary-storage environment.
- • If you upload from your browser, the browser must be able to reach the upload endpoint exposed by the Secondary Storage VM.
Global setting
Configure the browser-upload protocol when required
CloudStack normally expects HTTPS for local template, ISO, and volume uploads. If this is a lab environment and your Secondary Storage VM does not have working TLS for its upload endpoint, open Global Settings, search for use.https.to.upload, and set it to false.
Use HTTP only for a trusted lab network
Do not disable HTTPS simply because it is easier. For an Internet-facing or production deployment, configure valid TLS and keep HTTPS uploads enabled.
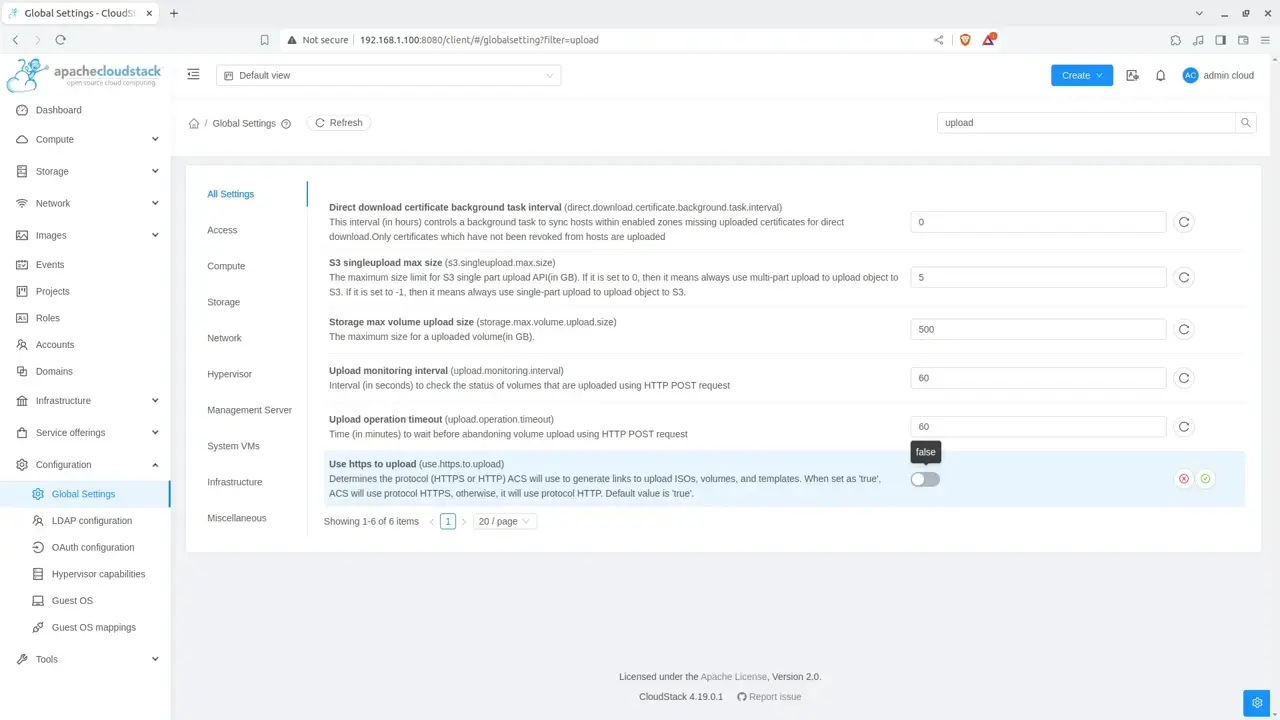
use.https.to.upload to false.Secondary Storage VM
Restart the Secondary Storage VM after changing the setting
The Secondary Storage VM receives the upload configuration when it starts. After changing use.https.to.upload, open Infrastructure → System VMs, select the Secondary Storage VM, and stop/start or recreate it so the new upload protocol is applied.
Wait until the VM returns to Running and its agent is Up before continuing. If you did not change the upload setting, you can skip this step.
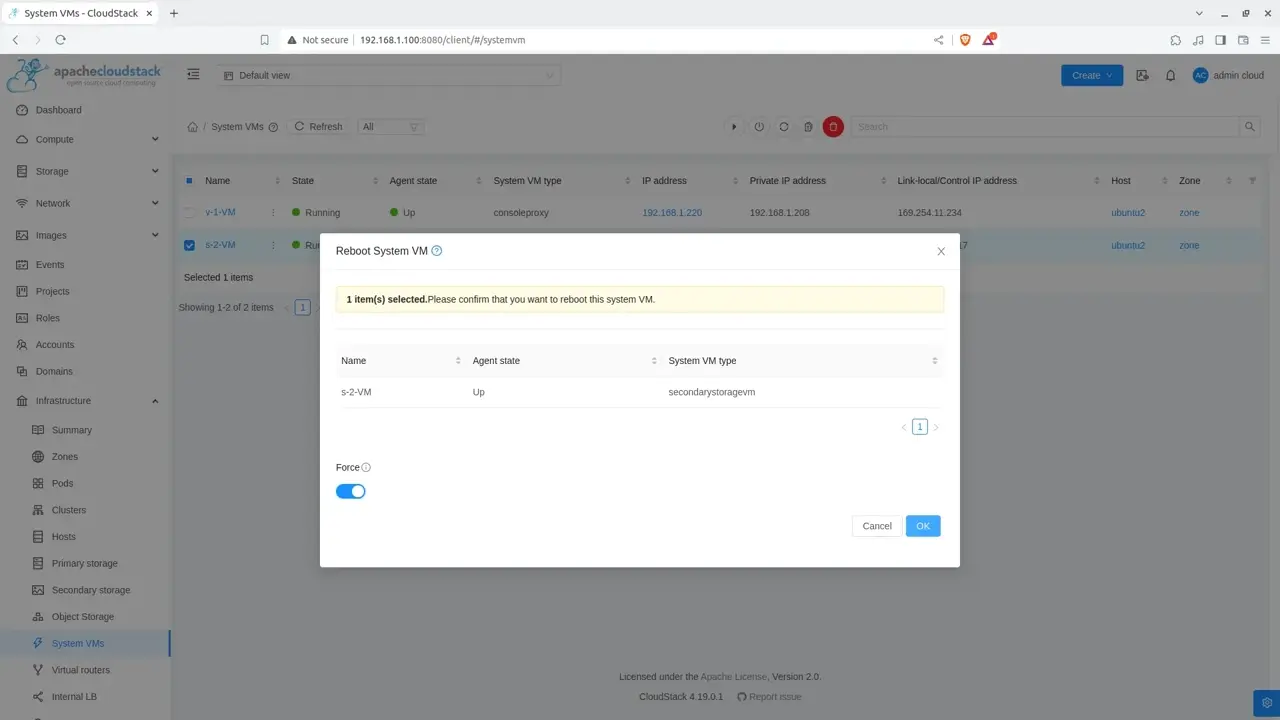
Template
Upload or register a KVM template
Open Images → Templates and choose the option to register or upload a template. You can either provide a URL that CloudStack can download or select a local file when local browser upload is available in your environment.
| Field | Example | Notes |
|---|---|---|
| Name | Ubuntu 24.04 KVM | Use a clear name users can identify. |
| Zone | Zone1 | Choose where the template should be available. |
| Hypervisor | KVM | Must match the image you prepared. |
| Format | QCOW2 | Normal disk-image format for KVM templates. |
| OS type | Ubuntu / Other Linux | Choose the closest matching guest operating system. |
Make sure the format matches the hypervisor
A file extension alone does not make an image compatible. For this KVM series, use a properly prepared QCOW2 image and select KVM + QCOW2 in CloudStack. Selecting the wrong hypervisor or format can cause registration or deployment failures later.
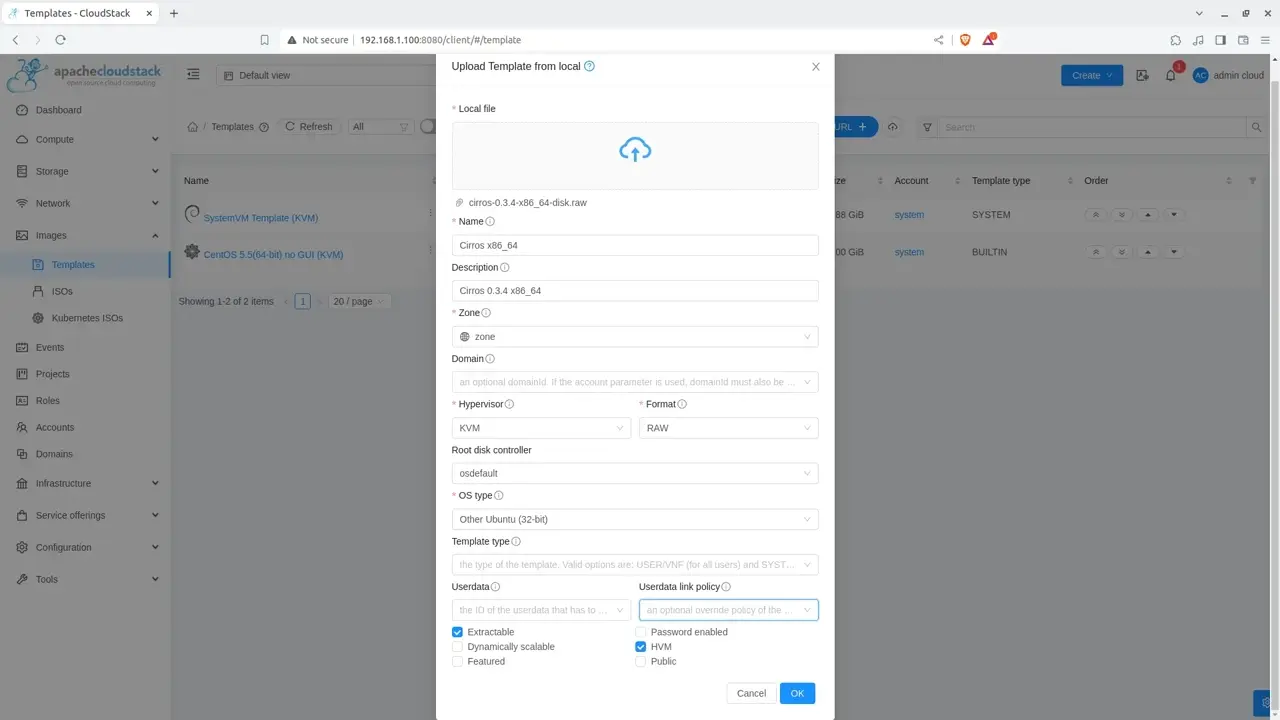
Template status
Monitor the template download or upload progress
After registration, CloudStack transfers the image to secondary storage. Open the template and check its zone/status information. Do not try to deploy from the template until CloudStack reports that the transfer is complete and the image is ready.
Downloading
Wait
The Secondary Storage VM is still transferring the image.
Download complete
Good
The template is stored successfully on secondary storage.
Ready
Yes
CloudStack can offer the template for instance deployment.
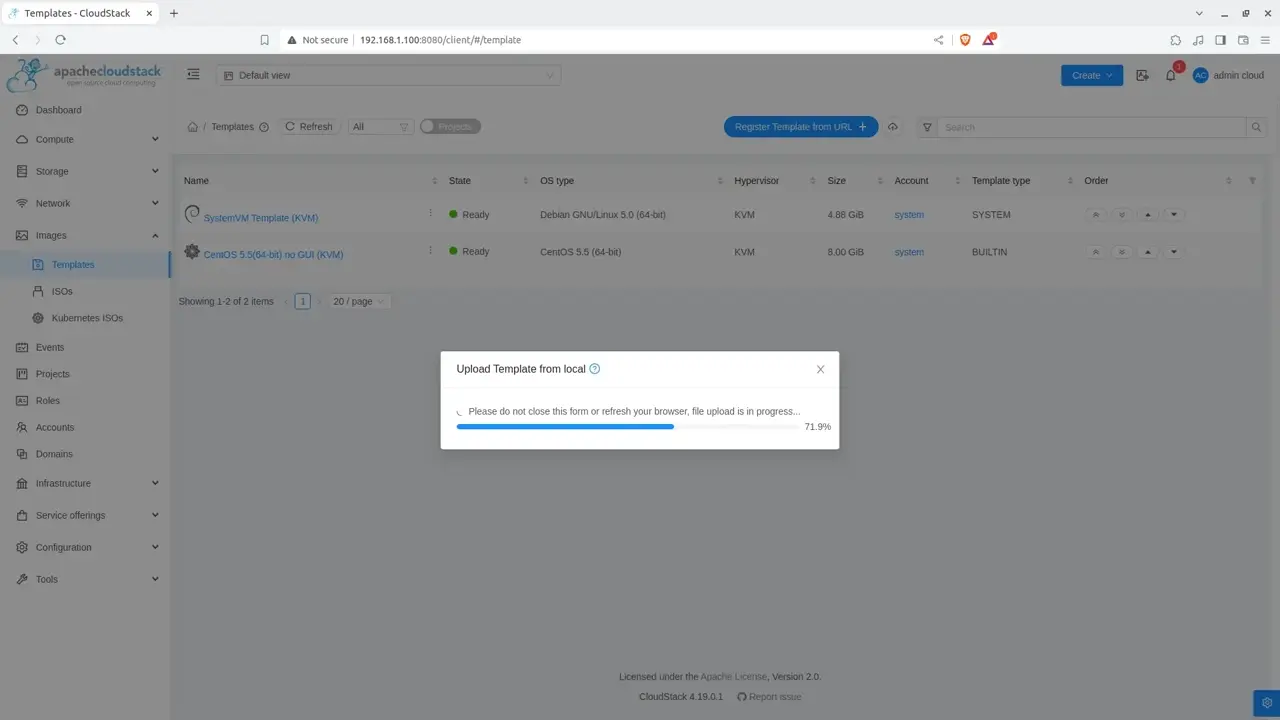
ISO image
Register an ISO image from a URL
Next, open Images → ISOs and add an ISO. For URL-based registration, enter a direct URL to the .iso file. The source must be reachable by CloudStack and should not require an interactive login page.
| Field | Example |
|---|---|
| Name | Ubuntu 24.04 Server ISO |
| URL | https://example.com/ubuntu-server.iso |
| Zone | Zone1 |
| Bootable | Yes |
| OS type | Ubuntu / Other Linux |
Enable Bootable when the ISO contains an operating-system installer that should be used to boot a new instance. Non-bootable ISOs can still be attached later as virtual media.

ISO status
Monitor the ISO download progress
Just like templates, the ISO must finish transferring to secondary storage before it can be used reliably. Open the ISO details and monitor its zone status until CloudStack reports that the download is complete and the image is ready.
If the transfer fails
Check the source URL, DNS resolution, firewall rules, Secondary Storage VM connectivity, available secondary-storage capacity, and TLS certificate trust when HTTPS is used. The Management Server and SSVM logs are useful when the UI only reports a generic download failure.
Validation
Verify the template and ISO are ready to use
Before moving on, verify that both images show a successful status in the zone. The template should appear as an available image when you create a new instance. A bootable ISO should be selectable when you choose to deploy an instance from ISO media.
Template check
Create instance → Template
Confirm the new template appears in the image-selection step.
ISO check
Create instance → ISO
Confirm the bootable ISO appears as installation media.
Images ready
Your CloudStack image library is ready.
You can now deploy instances from prepared templates or boot from ISO installation media. The next guide will build on this environment by configuring high availability and failover.